Thursday, January 31, 2008

Facts about Fries

Yesterday the fry container turned Valentine was a huge hit. (scroll down if you missed it) Because of this we had a dedicated few who went on a fry taste testing trip. The purpose was of course to get the container the fries come in but it came with it's benefit, a reason to eat fries - it would be wasteful to just chuck them after all. Anyway, after several different stops and purchases of different sizes of fries, it was determined the best fry box for the project shown on yesterday's post was .... drumroll please.... medium fries from Burger King. Now, just because this research has been done for you, please feel free to conduct your own experiments. After all, we didn't say anything about Wendy's Chicken nugget containers....

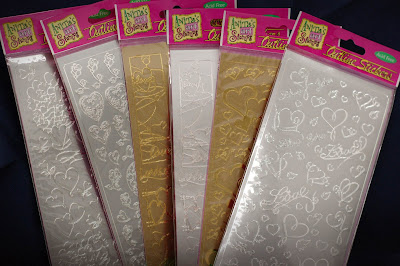
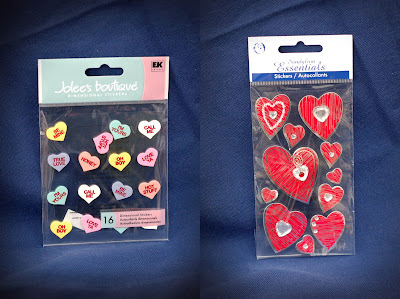
And, because no post is complete without a picture, here are some more Valentine stickers that would look really cute on your little decorated fry boxes.
Wednesday, January 30, 2008

Work It Wednesday - french fries and valentines

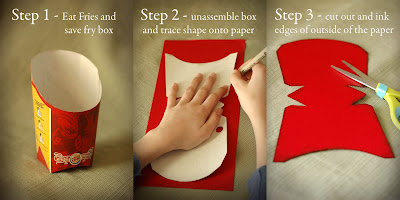
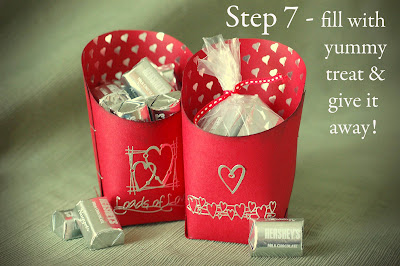
Happy, wet and rainy Wednesday. As you know Work It Wednesday is where we feature some trick or tip that you can do with your paper crafting supplies. Since Valentines Day is coming I wanted to share a little something that you can make for a special someone. All you need is some cardstock, stickers and french fries (mine came from Burger King). And, yes, I do realize that most people don't think of french fries when they think of paper crafting or Valentine's Day for that matter. But the combination makes perfect sense to me, here's what I mean: (If you have trouble reading the words on the photos, click on the photo to enlarge)


And then after you've done all that, you do the last step:


See, french fries, paper crafting supplies, and Valentine's Day really do go well together.
Enjoy,
Amy

P.S. The stickers I used are called Outline Stickers. They were a huge hit at Christmas time and I must say I love the variety of Valentine's themes even more. Here's some that we have in the store.

Tuesday, January 29, 2008

Super Bowl supplies

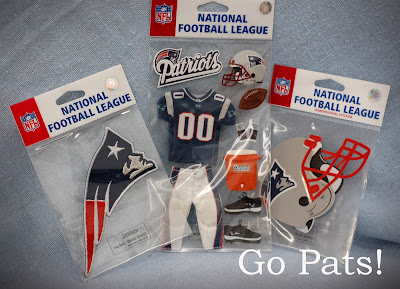
The super bowl is coming up, are you ready for the big game? The groceries stores are pushing chips and soda but we think you should stock up on cardstock, adhesive, and stickers. And speaking of stickers, aren't these Patriot themed stickers from EK Success awesome? They just might in come in handy if you've got a Pats fan in your family. Just think, you could pick these up today and put them to use on a scrapbook page while you're watching the game. Now that is making good use of your super bowl supplies.

Saturday, January 26, 2008

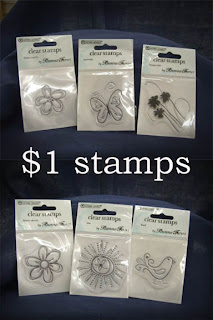
Here are the new acrylic stamps we just started carrying in the store. The best part? well, besides their cute designs and the fact that they are easy to use...
They are only a $1

Such a deal but they are going fast. They remind me that spring is coming and for that I am thankful. Can't you see some of these on Easter or Mother's day cards?

Friday, January 25, 2008

love is in the air....


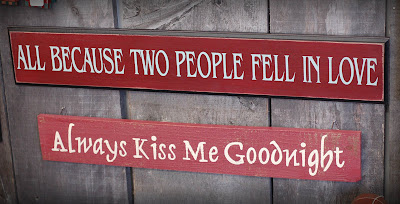
Valentine's day is just a few short weeks away. I've got a few projects that I can't wait to show you but for now I just want to share these signs. We've carried signs for quite awhile but these are two of my most favorites and they seem fitting for this time of year.

One thing I love is when an item can be used for more than one occasion. These signs remind me so much of Valentine's day, I guess it's because of the love sentiment. However, these are the type of thing I'd leave up all year simply because they are so awesome.

I can see the "All because two people fell in love" sign hanging on a wall with my children's pictures hanging all around it. Or, even black and white wedding pictures would be nice.

We have just a few of them so if you are interested in getting one let us know soon.
Smiles,
Amy

Wednesday, January 23, 2008

Wednesday!

This is not the idea I had planned to share. My original idea had something to do with Valentines day and French Fries - weird, I know. But, it is a cool thought and is one I will share after my camera battery comes back to life and I can take pictures again. (hopefully tomorrow) Until then though, here is another idea that you can tuck away for your Work It Wednesday.
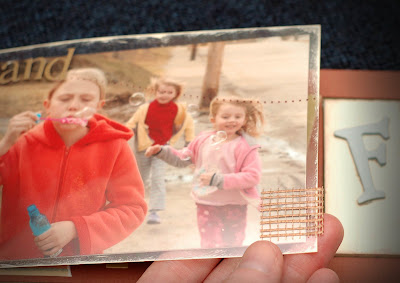
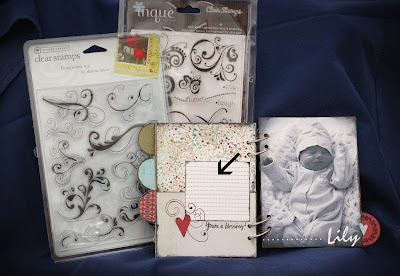
Journaling cards are a great addition to any scrapbook layout. By adding one to your page you have taken all the work out of wondering where to add your journaling. Plus, it gives you straight lines to make hand journaling a little easier. Now, there are several companies who sell this type of thing but our work it tip of the day is making your own. Here's how:

Open a word document program and starting at the top of the page hold down the "shift" key and the dash key at the same time. (The dash key is located next to the zero on your keyboard) Keep holding it down until you have filled a full page. Then hit print. Once it is printed you can trim it to any size you want. I like to keep mine small about 3x3 usually, and close at hand for quick journaling. Depending on your computer program you can even change the line style and size. I like to use dots as my lines, something like this (.....................................................................)

If you are feeling really creative you can make a text box first and then place the lines inside the box. This will give you a little frame around your journaling.

The photo above shows a journaling card in use, all it needs is the story to be written in place. Also in the picture are some of our new acrylic Flourish stamps - these are so cool! They are so easy to use and add a nice finishing touch to my journaling card. We now carry these in the store and have more on the way.

So that's it. We have a ton of new stuff to share with you. I was in the store yesterday and have a ton of things to share with you so check back tomorrow.

Enjoy,
Amy

Wednesday, January 16, 2008

Work It Wednesday - It's Magic

It's still Wednesday - For those of you that are new to our store blog, Work It Wednesday is where we show a quick tip or a project idea that you can use on your scrapbooking, card making, or paper crafting projects. This week I decided to bring back a blast from the past. And, it's magic...... Magic Mesh that is. You long time scrapbookers probably have this some where in your stash. And, if you don't have any, you might want to stop by the store and pick some up.

Magic Mesh isn't the latest trend. It was big a few years ago but it's kind of been forgotten. However it is such a versatile product that while it isn't the latest trend, it can be used to make items that are popular today.


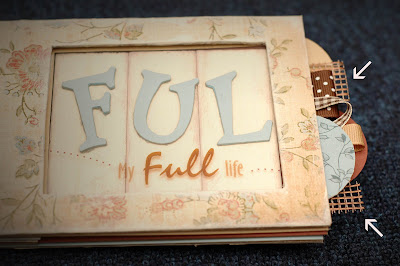
One thing that is popular in paper crafting today are tabs. It seems you can't look at a layout or mini-album without seeing a tab of some sort. Magic Mesh works perfectly for making tabs. Because it has an adhesive back all you need to do is cut it to the size you want, fold it over the end of your page and your done. Here's another photo using it on a transparency.

There are a lot of other things you can do as well. You can run it along the edge of your page for a border. You can lay it down on a piece of cardstock and slide an ink pad over it to create a custom print, and you can cut to any shape or size to make custom page elements.
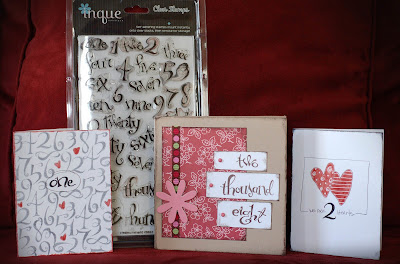
If you have Magic Mesh in your stash, pull it out and play with it. If you don't own any, you could get some, or simply just go look through what you do have and make an effort to use something that you've had for awhile. You might be surprised what you can come up with.

Enjoy,
Amy

Saturday, January 12, 2008

Inque Boutique Stamps

Earlier this week our shipment of Inque Boutique items arrived. And, as promised, here is a highlight of just ONE of their items.
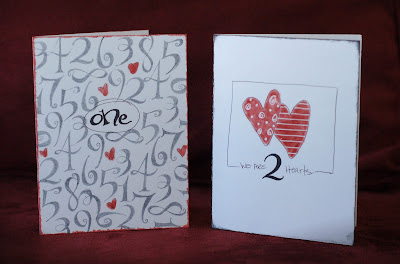
The set featured here is called "Sharie Numbers" and in my opinion, is a perfect set. I have made many projects using this stamp set, cards, calendars, scrapbook pages and planners are just a few. The set comes with numbers 0 thru 9 and then several different numbers spelled out.


These two valentine cards were made in a jiffy using the stamp set. Although you can't see the inside, I used the stamps on the inside too. The first card says "I've been counting and you're still my number 1!". The front of the second card says " We are 2 hearts" and you open it up to read "that beat as one."

And last but not least is a cookie sheet calendar that was made using some of the stamps from this set. Numbers 3, 6, 10, 20,29 & 30.

So, there you have it, just a few things you can do with this awesome stamp set. There are so many other possibilities too. Stop in and see the set in person and while you are in the store, check out the other sets we have from the same company - all of them are fabulous.

Wednesday, January 9, 2008

It's Wednesday!!!

It's time for another Work It Wednesday!

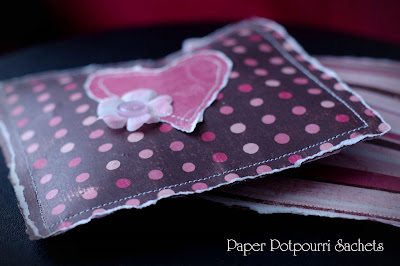
Ok, first of all, this is not my idea. I was completely inspired 100% by Kim Morgan. She is on the editorial board of Simple Scrapbooks Magazine and I love her work. You can see her original idea here She made her potpourri sachets for Christmas gifts and I'm totally using the idea for Valentines day.
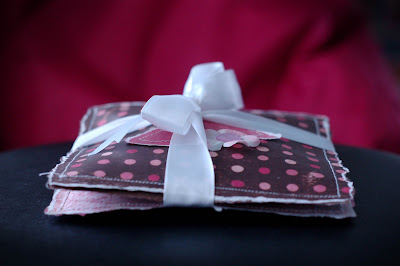
Since it is Work it Wednesday, and you all know how much I love to use my paper supplies for more than just cards and layouts, I thought this one would be a good one to show. They are simple to make and smell fabulous. Here's what you do:

1- Dig through your stash of papers and pick out a sheet of heavy weight patterned paper. Trim it into squares. I used a 12x12 piece and was able to get 4- 6x6 squares. (Quick tip: If you use double sided paper, you can make a set of two from one piece of paper - Now that is cool!)

2- Place the papers back to back and stitches around three sides to make a pocket.

3- Fill pocket with potpourri

4- Stitch pocket closed.

That's it! They are that easy. Now, if you want to decorate them up a little, you can use adhesive to add items to the top. Or before you stitch the two pieces of paper together you can sew on some embellishments like I did. Another thing I did was after the potpourri was inside the pocket and it was all stitched closed, I very carefully tore all of the outer edges.


After you have a couple of sachets complete, stack them together, tie a quick bow and there you have it, a quick, great smelling, Valentine gift for a child's teacher, co-worker, grandma or anyone else you can think of.

Enjoy,
Amy

Saturday, January 5, 2008

Before and After

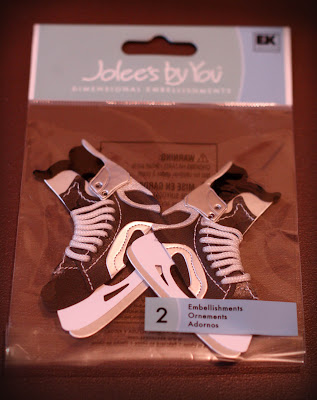
You know those before and after shots? You know the ones, usually it's people who have lost weight or have had a make-over. Well I was just looking at some of our new stock of Jolee's By You stickers and realized we can apply the "before and after" concept to our paper crafting as well. Sure I have lots of layouts that I'd love to re-do and I could do before and after scans of them and then show them here (hmmm, maybe that's an idea for a different post) but that's not quite what I was thinking. Here's an example and hopefully you'll find this humorous. If you are a hockey fan or have one in your family, you'll understand completely.

The Jolee's By You stickers for the "before"


You could use these on a layout about the sport or someone's passion for it. Or you could put them on a card wishing someone good luck with their game. That's a cool idea right? (These stickers are really cool in real life, the photo really doesn't show the details or size all that well.)

Then you could do the Jolee's By You "after"

You could use these stickers on a layout or on a get well card. You know, the after the game and after the dedicated, hardworking player is on the mend. We have a friend who is an amazing and passionate hockey player but we know when it's hockey season he'll show up with new bangs and bruises daily. This would be a fun thing for him and I'm sure for many other players and fans as well.
Stop in and see what other "before and after" stories you can create with the Jolee's By You stickers that we've recently stocked. We've got other sports too, tennis, skiing, fishing, hunting, and many, many more.

Wednesday, January 2, 2008

Work it Wednesday

HAPPY NEW YEAR!!!

How's your day 2 going of the new year? Other than lots of snow and bored kids, mine is going great. I haven't been in the store today but I did talk to Judy and she is busy putting out all the Valentine items. It's never too early to plan ahead for the next holiday, so stop in soon and see what she's been up to.

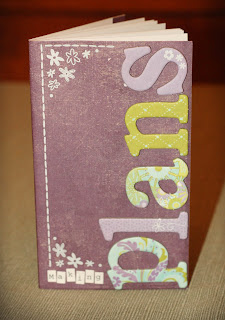
As for today, it's our first Work It Wednesday of the year. And, since it is a new year, with new plans, it only seems fitting to show a quick tip on how to customize a planner.

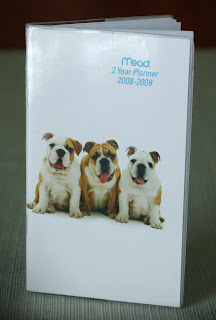
First, you need a planner. We don't sell these at Judy's but you can pick them up at a lot of other places. I found mine at Walmart.

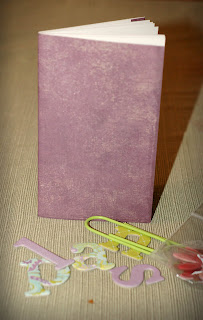
Second you need to remove the planner from it's plastic sleeve (if it has one) and get ready to cover it. Now, don't get me wrong, I have nothing against cute puppies, but I wanted the planner to be a little more me. That's where my scrapbooking supplies come into play. Pick out some paper you love and then find some matching embellishments and get to work.

Measure your planner and trim your paper accordingly. I chose to cover the back of my planner too, so I just measured and cut the purple paper to fit the height and then just wrapped the paper around the back and glued it down. Next you will add your embellies. Decorate it however you'd like. Add chipboard letters or throw on a photo, anything goes.
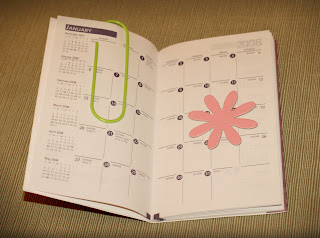
Once it's complete, place it back in the plastic sleeve to keep it protected and you are good to go. You can also decorate the inside with your scrapbooking supplies as well. I keep a large paper clip in mine at all times to keep my page marked for quick reference. And, for special dates (like the next time I will be in the store) I will place stickers or chipboard shapes to mark the date and to add a look of fun to my normally boring schedule.

So there's your tip for the day, remember scrapbooking and cardmaking products aren't just for scrapbooking and cardmaking - they can be used for so much more.


Enjoy,
Amy