Monday, June 30, 2008

Product update - quick tip

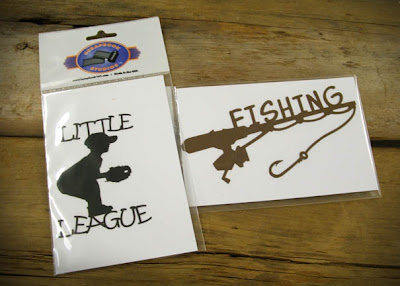
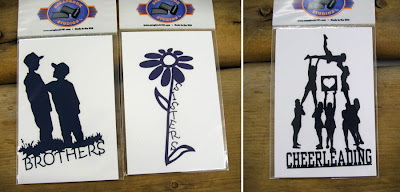
Just another quick product update. We received another shipment last week and have some new styles of die cuts. Last Monday I showed you the Little League and Fishing die cuts and a few days later these came in.

QUICK TIP!
If you are looking for a unique way to use your die cuts remember they can be used as a mask too. Simply lay them on a paper and chalk, or paint, over them and then lift up the die cut. You'll have a reverse image of the die cut on your layout and then still have the die cut to use for another project.

Have a good Monday!
Amy

Friday, June 27, 2008

Animals in the House

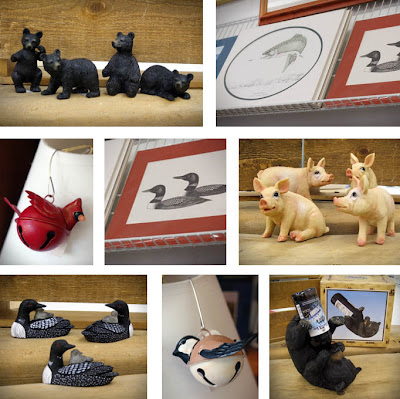
The Animals have arrived and are all looking pretty cute in the gift shop. If you are looking for a quick little gift or love a Maine themed trinket, stop in and check these out.

Wednesday, June 25, 2008

Work It Wednesay - Frame it Up!

It's Wednesday and for today's post I'm channeling my inner wanna-be Pottery Barn self (does that even make sense?). I love looking through home decor magazines. They are always filled with such great ideas and awesome photos. The problem though is I'm as practical as they come and, I admit, a little cheap too. I have issues spending big bucks on things that I know I will just want to change when the next trend blows in. So, I've come up with some of my own ways to decorate that lets me be practical, allows for frequent change, and the best part - I can use my scrapbooking and paper crafting supplies to do it! After all isn't that what Work It Wednesday is about, finding ways to expand upon our craft?

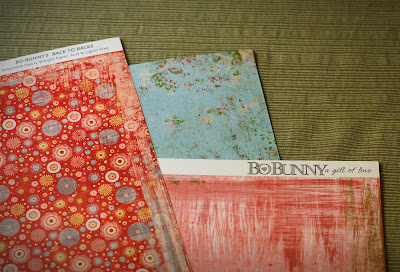
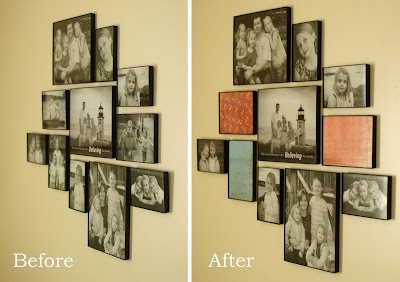
In my kitchen I have a photo collage of some of my favorite photos of my family. I love it. However, every once in a while I like to change it up. One of the ways I like to add some changes is to simply add some cool papers in the frames. It's easy, it's really inexpensive, and I know I can find all kinds of cool papers at Judy's. I can swap out paper designs for each holiday or for special occasions. Here's a before and after so you can see how much just a little punch of color can change the look. (The papers I used are shown in the larger photo above - they are some of the new papers at Judy's.)

You can do this with any frame you have. You can even just group framed paper together to make a conversation piece in your home. Take a look around your home and take note of the framed items you have. Maybe they are wall hangings like mine, or maybe they are freestanding frames on your fireplace, either way, pick some paper you love and frame it. It will add a nice punch of color and will be a fun addition to your home.


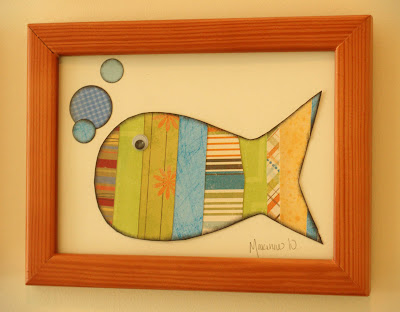
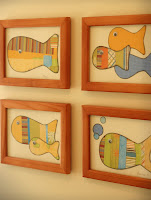
And, here's another fun idea that is along the same lines. If you've got a lot of scraps hanging around turn them into art. You can do this on your own or get your kids involved. My upstairs bathroom is decorated with a fish theme. It's mostly used by my kids so I wanted them to help decorate it. I cut out some basic fish shapes on white cardstock and then let them cut paper scraps and glue them in place to make different fish. When they were done we added a googly eye and put their designs in a frame, instantly turning their work into art. It was quick, easy and I the best part again was using up some paper scraps and my supplies I already had on hand. You can try this with any shape or design: hearts, fish, flowers, light houses, etc...

So, there you have it. That's today's Work It Wednesday. If you want to give this idea a try be sure to check out the new papers at Judy's. They come in all sorts of amazing colors and designs.

Enjoy!
Amy

Monday, June 23, 2008

new stuff....


I just wanted to really quick share some cute new die cuts we now have in stock.
Enjoy!

Friday, June 20, 2008

Summer time...

Today is my kids last day of school so it's official that as of 11:00 it is now summertime in the Williams household. With summer here and our schedules changing it's time to update a few things and gear up for a summer of fun. Here are somethings you can get at Judy's that might help you make it through summer too...

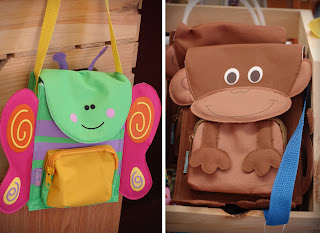
1- Are your kids in need of new lunch boxes to take on picnics and summer camps? I ask because after a year of going to and from school everyday, our lunch boxes should be burned or buried - it's clearly time for some new ones. Every time I'm in the store I look at these...

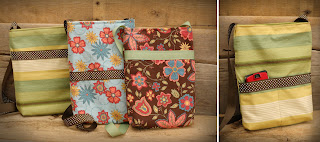
2- And what about a new bag for you? Maybe not a lunch bag but how about a new purse? These great little purses are sold only at Judy's. They have a magnetic closer, pockets on the inside and pockets on the outside for quick access to things like keys and cell phones. Plus the strap is long enough that you can wear it across your body and keep your hands free for other important things - perfect for summer day trips.

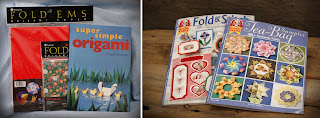
3- Have you updated your back up plan lately? Even the best made plans can have hiccups. The weather can change, the play dates can get canceled, hubby can spends too much time in the bike shop, etc... because things like this happen it's always wise to have a back up plan. These fun little origami books are great to have on hand. Perfect for a rainy day or to keep in your car to keep little fingers (or your own) entertained.


I'm looking forward to a great summer and I hope you are too.
Enjoy,
Amy

Thursday, June 19, 2008

Product Pick

I've been wanting to show this little beauty for quite awhile but kept waiting until I had a project done to show you as well. However, the project will have to wait for another day as I want to share my latest find.


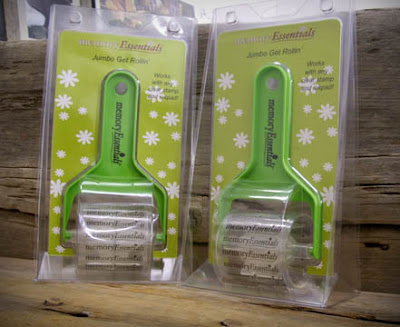
Seriously, have you ever seen these? If you are a stamper, or not- like me, than you might be interested in this. I saw this advertised in a magazine and asked Judy to order it - she's so great to do that for her customers - this is like a stamping brayer however it's better. To use traditional brayers you have to swap out the stamping heads and then you can only use one design at a time. Every time you want something different you have to change the rollers and the ink colors. With this little beauty you don't have to do that. You can use any type of self-clinging stamp, like acrylics or unmounted rubber, and make your own designs, ink it up on a pad and there you go - done! You can mix all kinds of designs too, add flowers and alphabets, bees and butterflies - whatever you want, whatever you can imagine. It is my product pick of the day and if you haven't seen it yet, I encourage you to stop in and check it out.
Enjoy!
-Amy

Wednesday, June 18, 2008

Work It Wednesday

I've been asked a lot of questions about the photos I use for my scrapbooks. I am lucky enough to be married to a man who used to be a pro-photographer. He has since changed careers though so a lot of the photos I use for my scrapbooking are my own. And, where I used to rely on him for the editing, I do that now too. What does all of this have to do with Work It Wednesday? Well, I'll tell ya. Work It Wednesday is about finding new ways to better your craft and for me, one of the ways I do that is through the way I store and use my photos.

I use two programs; for quick and easy I use Picasa and for more indepth things I use Photoshop. If you currently aren't using a photo program like one of these I highly recommend that you give one a try. For me, Picasa is more user friendly, plus it's a free download. I love it because it is my way of keeping my digital photos organized. I can also edit my photos, send them to the printer, and create web albums for sharing super quick with this program.

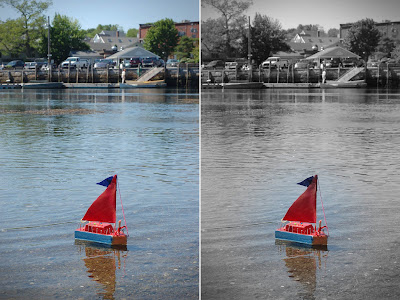
One of the things I liked to do in Picasa is add some interest to my photos. The photo on your left is just a color photo, it's well composed, color is good and it would look great on a scrapbook layout just as it is. However, with the photo on the right I used an tool in Picasa called "focal black and white" this allowed me to keep the color on the boat and change everything else to black and white.

If you haven't explored your photo editing software I encourage you to do so, and if you don't have one yet, give Picasa a try. See what kind of cool things you can do with your photos. I think you'll like the results and will be happy with how your edited photos will increase interest on your layouts.

Enjoy!
Amy

Monday, June 16, 2008

Cool Item


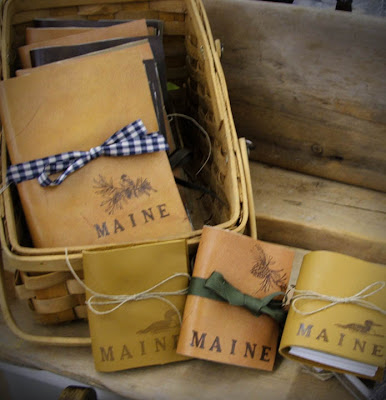
Hey there. I wanted to show you a new item we have. These are hand-crafted journals/notebooks. The items shown are Maine themed however we have others that are more generic and every bit as cool.

Enjoy and I hope you are having a wonderful Monday!
Amy

Thursday, June 12, 2008

Count Down Books


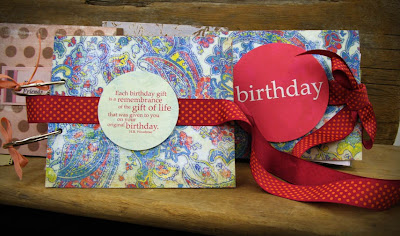
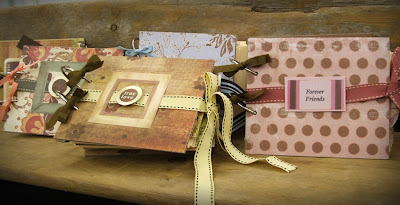
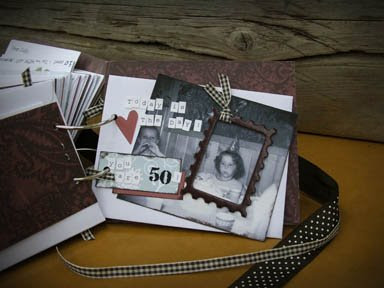
Back in April when I sent out the request to have people write notes to Judy for her birthday, I had no idea the whole count down book would be such a hit. For those of you who are new here, I made a count down book for Judy's birthday and collected 50 messages from 50 of Judy's friends and family members and compiled them in a book of envelopes and pockets. She then opened and read one message a day until it was her birthday. Since that time we've had a ton of interest in these books. So, without further delay... you can now buy them at Judy's.

Here's the scoop. The books come in either 21 or 50 envelopes. You can use them for any number of things, like birthdays, anniversaries, or other special occasions. Judy made them be 21 and 50 as those are two milestone ages, however, if you wanted to use them for another age or date, all you need to do is take out the envelopes.

The cool thing about these books are they are pre-made. Judy's has done the hard part for you and all you need to do is collect the messages, stuff them in the envelopes and gift your gift away. There are lots of different styles and themes so if you've been interested in these books, be sure to check them out the next time your in the store.

Where's Wednesday?

Do you remember Where's Waldo? I loved the Where's Waldo books. I'd like to say I was a kid when they came out but instead I'll have to admit that I was an adult at the time. I must have liked them because I'm still just a kid at heart. Anyway, my point. Wednesdays lately are starting to feel a lot like Where's Waldo to me, it's two weeks in a row that I have missed our regularly scheduled Work It Wednesday. I've searched for some time to carve out to post but despite my searching, I still missed it. One of our favorite blog readers, Mona, said I should stop worrying about it so today I'm taking her advice. (Thanks Mona!) And I'm moving on.

Taking Mona's advice got me thinking about how we all inspire one another. No, I'm not going to get all deep on you but seriously, think about it, what has someone done, said, made, that has inspired you? Did you act on the inspiration?

On more than one occasion I've been inspired by our customers and blog readers and so for today's post I'd like to link you to a few fun projects that were links that were sent to be by some of you.

Kim many months ago referred me to this little cutie of a project. I've meant for months to post it, so today, in sharing inspiration, here it is: Nugget Purse

And since the Nugget Purse really isn't all that manly, here's an idea that maybe you could make for dad. It's from the same blog above but it's a note book made from a cereal box. It think it's pretty cool but what I really love is how she used the same technique to make a note book from a scrabble game board. It's shown at the bottom of her post.

So, thanks Kim for sending me the link to that blog. I've been inspired and hope now that I've past it along, that you can all be inspired too.

Amy

P.S. Did you like the count down book we did for Judy's birthday? If so check back later today, we've got something cool to show you....

Tuesday, June 10, 2008

A wallet for Dad


Here's one of the little projects that I wanted to share last week. It's a really simple, little mini album that you can make from one, yep one! 12x12 piece of paper and a 3.5x12 scrap. Plus, it's easy. Here's what I used to just make the album itself (to decorate it, you can add whatever you'd like)

Supplies:
1 - 12x12 piece of cardstock
1- 3.5 x 12 piece of cardstock
scoring tool
scissors
adhesive

Here's How:
First follow the diagram below.

Score your paper as shown starting at 3", then score at the 6" and 9" mark. Turn your paper and score again using the same measurements so that your paper when it's scored looks like a grid.

Follow the cutting diagram. Dotted lines show you where to cut, be sure to only cut those areas show.

And then fold, accordion style (back and forth) in the direction of the arrow. Here are some photos of some of the steps.
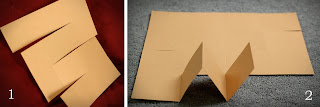
Photo 1: shows the 12x12 paper after it has been scored and cut.
Photo 2: shows the accordion folding process.
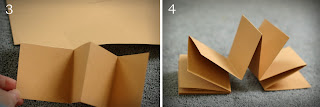

Photo 3: When you get to the end of your first folded row, fold the corner fold so that the first row folds under your second row and then continue accordion folding the second row just as you did the first. Repeating the process until the whole sheet is folded up into a small square. (refer to the folding diagram above)
Photo 4: Once folding is complete, you should have something that looks like this.

Photo/step 5: Not shown - however, you need to lay your piece of 3x12 paper out in front of you.

Photo 6: Add adhesive to one end of folded paper, and adhere in place at end of 3x12 paper.
Photo 7: Once the first end is secure in it's place, add adhesive to the back square and slightly fold the wallet over so that the back panel can be adhered to the cardstock.
Photo 8: Shows both ends of the cardstock adhered in place. Once that is done, you will have a long piece of 3x12 cardstock remaining. Fold the end over as shown in photo 8 and glue down.
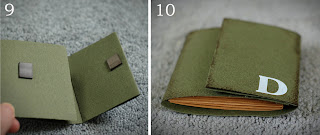

Photo 9: Fold project up to look like wallet and add some type of item to keep it closed. I used adhesive backed magnets.
Photo 10: Your wallet is complete and ready to decorate. I inked my edges to give is a worn look.

Enjoy!
Amy

Quick Tip: The pages that are formed from the corner folds, where you go from one row to the next, (photo 3) will work best if you glue the back sides or staple them together after you've completed all your folds. (In photo 8 you can see where I stapled mine)
Monday, June 9, 2008

Today is the day!!!


Today is celebrate Judy day!

As you remember, she's been counting down the last 50 days and today was her last day. She opened her last envelope and she has officially made it to her 50th birthday.


Happy Birthday Judy!
We love and appreciate you!


Thursday, June 5, 2008

Ooops!


Wow! So I blinked and Wednesday disappeared. Work it Wednesday had to be pushed aside yesterday so I could tend to some other pressing matters that arose. My apologies if you kept checking back.

I've got some fun little dad projects that are coming up but for now, here are two quick gift ideas that are for the Manly-man!


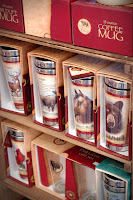
Does dad need a new coffee mug - yup!, he does. And, luckily Judy's has them in stock.

We also have cool glass sets and you could pick up a thermos or two while your there. Perfect for Dad!

Wednesday, June 4, 2008

Work It Wednesday

Hey all! I'm helping out with some end of the year school stuff today so Work It Wednesday is coming, just check back later today.

Thanks,
Amy

Tuesday, June 3, 2008

For Dad


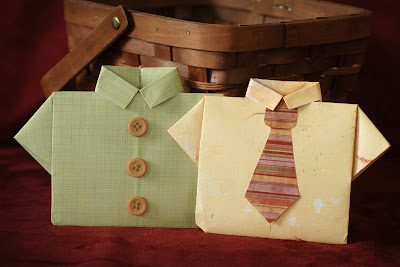
Here's a fun little idea you can make for dad, or any special man in your life. These little origami shirts have been around for quite awhile. In fact, I remember seeing them when I was a little girl and fitting enough, the first time I ever had one given to me was actually by my own dad. (He used to take money and fold it in fun ways before he'd give them to me to spend - see the link below) You can use these little shirts as either cards or gifts for dad.

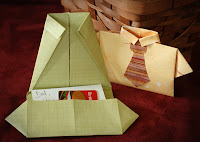
To use it as a card, make a paper shirt and just attach it to the front of a card for decoration. Maybe add a pocket with a tag sticking out that says "to dad".

If you want to use it as a gift, simply make the shirt and on the inside add a note and a gift card to your dad's favorite place.

So, how do you make these? Grab some paper (don't forget you can always buy manly paper at Judy's) and check out these links for step-by-step directions.

Cool You Tube Video - showing folding steps
Money shirt
paper shirt folding steps

Enjoy!
Amy

Monday, June 2, 2008

Father's Day

The week before Mother's day we featured gift items and some little projects that you could make for your mom. That was great, however since we did it just the week before Mother's day, it didn't really give you enough time to create or buy the items we featured. So, we learned our lesson and for Father's day we are starting early.
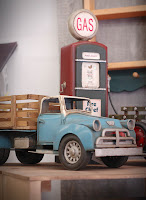
Whatcha gonna get your dad? You probably don't think of Judy's Scrappin and Stampin as your place to buy father's day gifts, however we have lots of items in our gift shop that dad would love. Plus, we've got some ideas on things you can make too. Check back every day as I will show something new. For now though, aren't these antique cars cool? They'd look great in dad's office....